

There's something special about living in the trees. A treehouse in Minecraft isn't just a shelter — it's a statement. It blends into the natural world, offers a high vantage point, and honestly just looks incredible when done right. Whether you're building a cozy one-room hideout or an elaborate multi-level base, this guide will walk you through everything you need to know.
Choosing the Right Tree
Not every tree makes a good treehouse base. Here's what to look for:
Large Oak Trees are the classic choice. They have wide, sprawling canopies and thick trunks that feel natural to build around. They generate naturally in plains, forests, and dark forest biomes.
Jungle Trees are massive — sometimes reaching 30+ blocks tall — making them perfect for ambitious, tall treehouses. Be warned: the canopy can be dense and hard to work with.
Dark Oak Trees have thick 2×2 trunks and large canopies, giving you plenty of surface area to build on. They're found exclusively in the dark forest biome.
For a beginner build, a large oak tree is your best bet. For something more dramatic, go with dark oak.
Materials You'll Need
The exact amount depends on how big you build, but gather these to start:
- Oak logs and oak planks (40–80)
- Oak slabs and stairs (20–40)
- Oak leaves or azalea leaves for decoration (optional, 20–30)
- Fence posts and fence gates (20–30)
- Trapdoors (10–15)
- Ladders or vines (for access)
- Lanterns or torches (10–15)
- Glass panes (20–30, for windows)
- Barrels, crafting table, bed (for interior)
Using the same wood type as the tree you're building in makes the treehouse feel organic and natural.
Planning Your Design
Before placing a single block, walk around the tree and decide:
- Where will the main platform be? Usually at the first or second large branch junction.
- How many levels do you want? One level is beginner-friendly; two or three levels make a stunning build.
- How will you get up? Ladders on the trunk, spiraling stairs around the tree, or vines are all good options.
Take a moment to look at the tree's natural shape. Build with the tree, not over it.
Step 1 — Build the Main Platform
Find a large branch or cluster of branches and start laying your platform there. Use oak planks or slabs as your floor. Let the edges be irregular — follow the shape of the branches rather than forcing a perfect square.
Extend the platform out a few blocks in each direction. Leave small gaps around trunk sections so the tree naturally pokes through the floor, which looks great and adds authenticity.
Add fence posts around the edges as a railing. One block tall is enough to suggest safety without blocking views.
Step 2 — Frame the Walls
Build walls up from your platform using a mix of logs and planks. Keep the walls low — 2 to 3 blocks tall — so the treehouse feels cozy rather than boxy. Leave gaps for windows and doors.
Use logs as corner posts and structural beams, filling between them with planks. This log-frame technique is one of the most effective ways to make wooden builds look realistic and not flat.
Adding a Doorway
Pick the side that faces your approach path and leave a 1×2 gap for the entrance. Add a door or fence gate to seal it.
Step 3 — Build the Roof
A good roof makes the whole treehouse. Here are two popular options:
Simple Slanted Roof: Stack stair blocks from each wall edge, working inward and upward toward a ridge. It's clean, fast, and looks great.
Layered Canopy Roof: Use a mix of slabs, trapdoors flipped upward, and leaf blocks to create an organic, natural-looking roof that blends into the tree canopy. This takes more work but produces stunning results.
Add a small overhang on each roof edge so rain runs off the walls.
Step 4 — Access: Getting Up the Tree
Your treehouse needs a reliable way in. Options include:
Ladder on the trunk — Simple and classic. Place ladders up the side of the trunk from the ground to your platform. Use bark logs or stripped logs to frame the ladder column neatly.
Spiral staircase — Build stairs wrapping around the trunk in a spiral. More complex, but very impressive. Use a mix of stairs and half-slabs.
Rope bridge — If you're building multiple treehouses near each other, connect them with fence post bridges or wooden paths stretched between the trees.
Step 5 — Interior Details
A treehouse should feel like a real home, not an empty box. Fill it with:
- A bed in the corner
- A crafting table and barrel or chest for storage
- A lantern hung from the ceiling on a chain (or torches in brackets)
- A bookshelf if you like the cozy look
- A small window on each wall for natural light
Keep clutter minimal — treehouse interiors look best when they're clean and purposeful.
Step 6 — Exterior Touches
The outside of your treehouse matters just as much as the inside. Add these finishing details:
Flower boxes — Place trapdoors on the outside of window ledges and fill them with flower pots or potted plants.
Hanging lanterns — Use chains with lanterns dangling below the platform edge. These glow beautifully at night.
Vines — Let vines drape naturally from the platform edges. They grow over time and add life to the build.
Balcony — Extend one side of the platform a few extra blocks with a fence railing to create a small balcony. Perfect for watching sunsets.
Step 7 — Adding More Levels
If you want a multi-level treehouse, repeat the process higher up in the tree. Connect levels with a ladder inside the treehouse or a small external stair tower built against the trunk.
Each level can serve a different purpose: the lower level for sleeping and storage, the upper level for an observatory or enchanting room. Varying the floor plans slightly on each level prevents the build from looking repetitive.
Lighting for Night
Treehouses can get dark at night, which is both atmospheric and dangerous. Light up your build with:
- Lanterns inside and hanging outside
- Torches hidden under roof overhangs (invisible from the front)
- Sea lanterns or glowstone hidden under the platform floor (they light up the underside without being obvious)
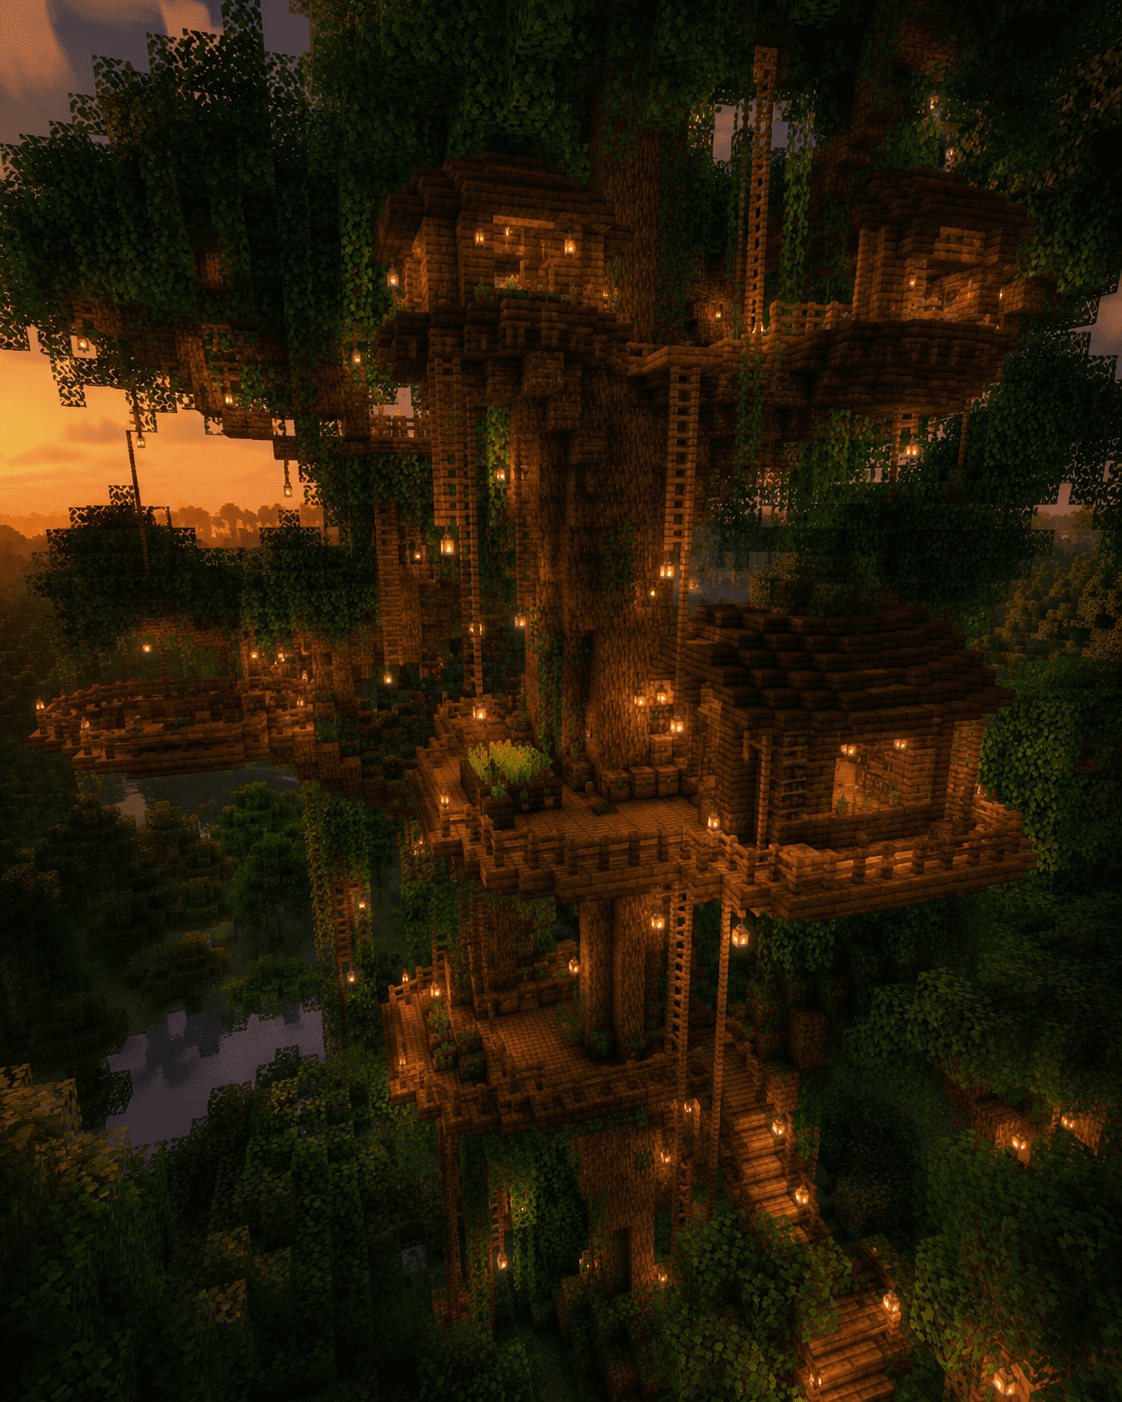
A well-lit treehouse looks magical at night and is a landmark you can spot from far away.
Tips for a Better Build
Mix materials — Don't use only oak planks. Combine oak logs, birch planks, stripped logs, and moss blocks for texture and visual interest.
Let the tree shape guide you — Irregular, asymmetric platforms that follow branch lines look far more natural than perfectly square boxes.
Don't forget the ground — Add a root cellar beneath the tree or a small garden around the base to complete the scene.
Grow your own tree — Use bone meal on a sapling to grow a large tree in the exact spot you want. This lets you control placement and find a tree with the ideal shape for your design.
Final Thoughts
Building a treehouse is one of the most rewarding projects in Minecraft. It's a build that rewards creativity over technical skill — there's no wrong way to do it. Start small with a single platform and a simple roof, then expand over time as you gather more materials and confidence. Before long, you'll have a treetop home you're proud to come back to.
Now grab your axe, find the perfect tree, and start building.