
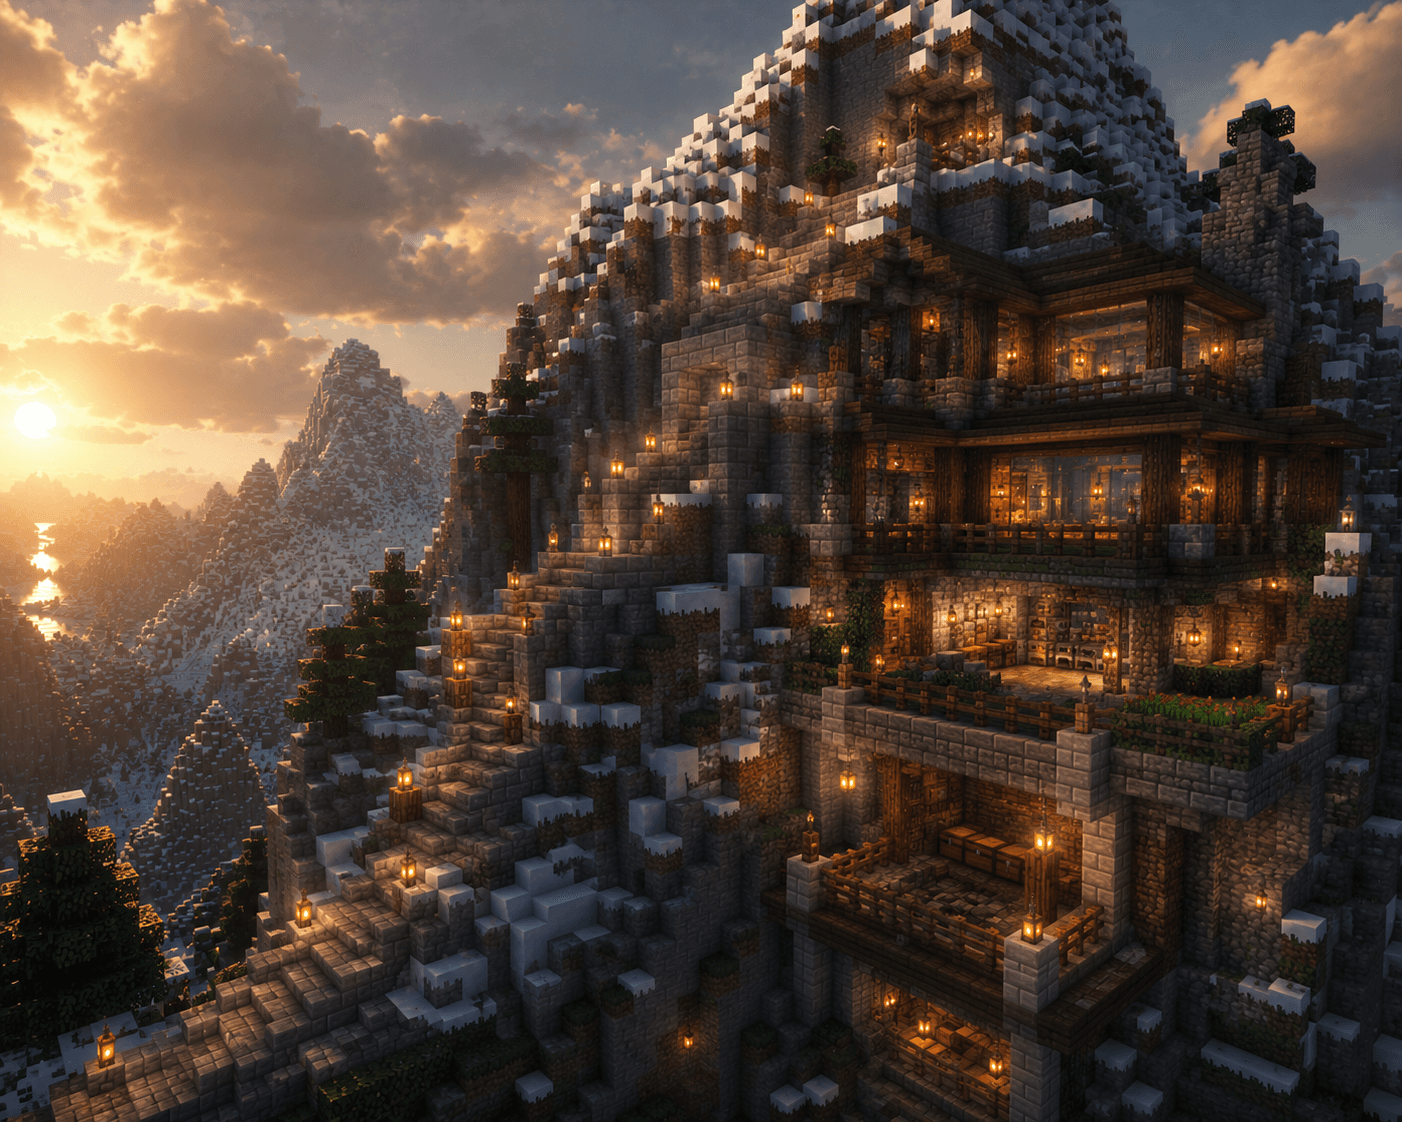

Mountains are some of the most dramatic terrain in Minecraft, and building into them instead of around them produces bases that feel like they belong to the world. A mountain base uses the natural rock as walls and roof, needs less material than a freestanding structure, and gives you a defensible, elevated position with a view worth the climb. This tutorial walks through planning, carving, and finishing a mountain base from scratch.
Why Build Into a Mountain
A mountain base has real practical advantages beyond looks. The stone around you is already a wall, so you save on building material. The elevation makes it naturally defensible against most mobs, since hostile mobs generally can't path up steep terrain easily. And a well-placed mountain base gets natural light through carved windows while staying hidden from a distance, since it blends into the rock face rather than standing out against the sky.
Step 1: Choose Your Mountain
Not every mountain works equally well. Look for a peak with a mix of a steep face (for dramatic window placement) and a flatter shelf or ledge partway up (for the main structure). Jagged Peaks and Stony Peaks biomes in modern Minecraft generate the most usable combinations of cliffs and ledges. Snow-capped Frozen Peaks look stunning but make farming harder nearby, so plan your food source before committing to one.
Walk the mountain's base first and look for natural cave openings — these often connect to larger interior spaces you can incorporate into the base rather than digging everything from scratch.
Step 2: Plan the Entrance and Layout
Decide where your main entrance will be before you start digging. A carved staircase leading from the base of the mountain up to your main level works well and can double as a defensive chokepoint. Mark out your rooms roughly with torches before committing to permanent walls — bedroom, storage, crafting area, and a farm room are the essentials most mountain bases need.
Keep your layout following natural stone contours rather than forcing perfectly rectangular rooms. Irregular, cave-like room shapes actually look more natural built into a mountain than symmetrical boxes.
Step 3: Carve the Main Structure
Start with the largest room first — usually a central living area — and use torches to light as you go to prevent mob spawns while you work. Leave the outer mountain face mostly intact except where you want windows; this keeps the base looking like a natural formation rather than an obviously excavated box.
For the floor, smooth stone, andesite, or wood planks all read well against natural stone walls. A wood-and-stone mix (wood floors, stone walls, exposed beams) gives the space a cozy, lived-in feel that pure stone alone doesn't.
Step 4: Add Windows That Frame the View
This is what separates a good mountain base from a great one. Instead of small, evenly spaced windows, carve larger openings positioned to frame a specific view — a valley below, a waterfall, or a distant biome change. Glass panes work better than full glass blocks for larger openings since they use fewer resources and read as thinner, more modern framing.
Position at least one large window near your main living space and consider a small balcony ledge just outside it, accessible by a short tunnel, purely for the view.
Step 5: Build Exterior Terraces and Staircases
A mountain base looks incomplete without some exterior elements connecting it to the mountain around it. Carve a staircase along the outer cliff face connecting different levels of your base, using stairs blocks and fences as a guardrail. Small terraces — flat ledges with a few blocks of farmland, a bench, or simply open space — break up the vertical climb and give the base a sense of scale.
Lighting the Exterior
Place lanterns or torches along exterior staircases and terraces both for safety (preventing mob spawns) and for visual effect — warm light against dark stone at night is one of the most striking looks a mountain base can have.
Step 6: Finish the Interior
Once the shell is carved and windows are placed, focus on interior details: bookshelves, item frames, crafting stations, and furniture blocks (using stairs and slabs creatively) make the space feel finished rather than just hollowed out. A fireplace — a simple arrangement of netherrack and fire, safely contained behind glass or in a stone alcove — adds warmth to a mountain base's aesthetic that fits the setting perfectly.
Tips for a Better Mountain Base
Managing Mob Spawns Inside
Any dark interior space in Minecraft can spawn hostile mobs if left unlit. Since mountain interiors involve a lot of stone and shadow, light generously as you carve rather than waiting until a room is finished — it's much easier to prevent spawns than to clear them out later.
Farming Near a Mountain Base
Flat farmland is scarce on a mountain, so look for a nearby meadow biome or terrace a section of the mountainside into flat farmland using dirt and a water source. Alternatively, build a small greenhouse-style farm room with glass ceiling panels to let crops receive sunlight even partway inside the mountain.
Blending New Construction with Natural Stone
When you need to add blocks rather than remove them, mix stone variants (cobblestone, mossy cobblestone, andesite, and stone bricks) rather than using a single uniform block. Real mountain stone has natural variation, and mixing textures makes new construction blend in far better than a flat gray wall.
FAQ
Q: How do I find a good mountain if my world doesn't have one nearby? A: Use the /locate biome minecraft:jagged_peaks command to find the nearest mountain biome, or check our guide to the best mountain seeds for pre-tested spawn locations with dramatic terrain.
Q: Is a mountain base harder to defend than a normal base? A: It's generally easier — most hostile mobs struggle to path up steep terrain, and a single carved staircase entrance is easy to gate or light up as a chokepoint.
Q: What building materials work best for a mountain base? A: Stone variants (cobblestone, andesite, stone bricks) for structure, wood for floors and warmth, and glass panes for windows. Avoid overly bright or colorful blocks that clash with the natural stone palette.
Conclusion
A mountain base rewards patience with one of the most visually striking builds available in Minecraft. By working with the mountain's natural shape instead of against it, carving generous windows, and mixing stone textures thoughtfully, you end up with a base that looks like it was always part of the landscape.
If you're looking for the perfect mountain to build this on, check out our guide to the best mountain seeds for Minecraft 1.21.