

Eggs in Minecraft are one of those resources you never think about until you actually need them — and then you realize you have none. Whether you're mass-crafting cakes, tossing eggs at mobs, or just stocking up your pantry, having a steady passive supply is a game-changer. The good news: building an automatic chicken egg farm is surprisingly easy and requires very few materials.
In this guide, you'll learn how to build a reliable, fully automatic chicken egg farm that collects and stores eggs for you around the clock.
Why Build a Chicken Egg Farm?
Chickens lay eggs every 5–10 minutes in Minecraft. On their own, that's not very impressive — but scale that up to a dozen or more chickens in an enclosed space, and you're looking at a constant flow of eggs being deposited into a chest without you doing anything.
Beyond eggs themselves, you can extend this farm to also produce chicken meat and feathers by adding a lava blade mechanism — but this guide focuses on the simple egg-collection version first, which is perfect for early to mid-game.
What You'll Need
To build a basic automatic chicken egg farm you'll need:
- Glass or any solid blocks (16–24 blocks)
- Hopper (1–2)
- Chest (1)
- Trapdoors (2, optional but helpful)
- Chickens (at least 6, the more the better)
- Seeds, wheat seeds, or beetroot seeds (to lure and breed chickens)
That's it. No redstone required for the basic version.
Step 1 — Choose a Location
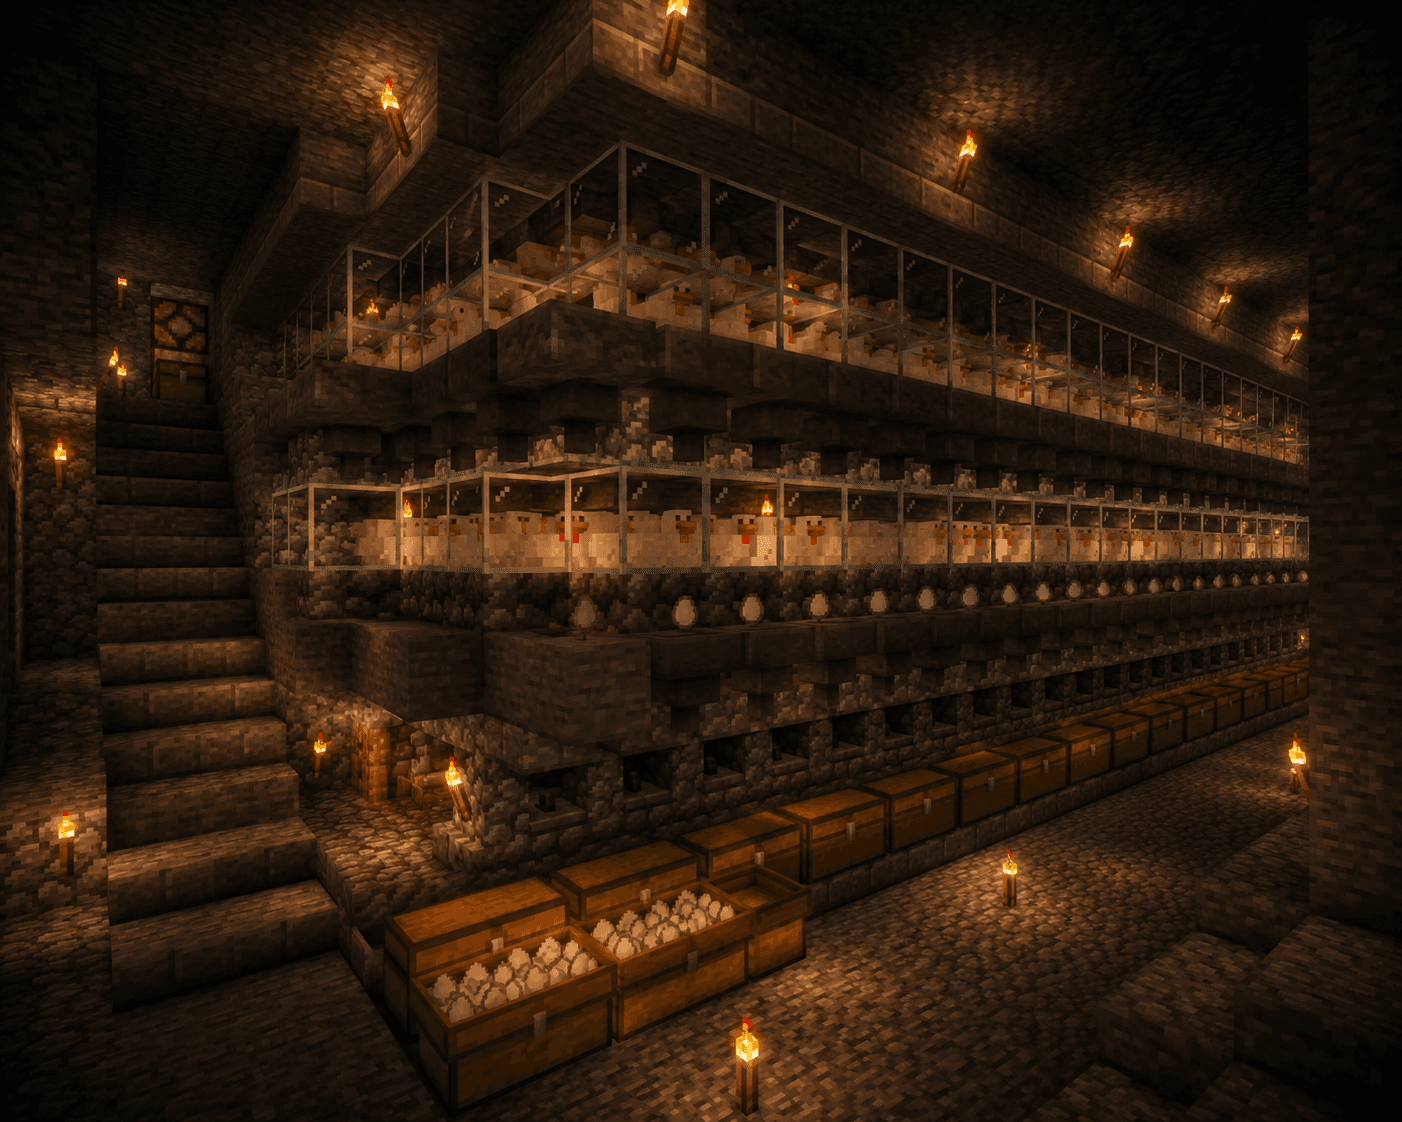
Pick a flat spot near your base. The farm is small — roughly 3×3 or 4×4 blocks wide and about 2 blocks tall — so it fits easily next to a house or underground. An enclosed basement works great because it keeps chickens from despawning due to distance.
Step 2 — Build the Base
Start by placing your chest on the ground. Next, place a hopper directly on top of the chest — to do this, hold Shift and right-click the chest with the hopper in hand. This links the hopper to the chest so eggs flow directly in.
Now build a 3×3 box (or larger) around the hopper, leaving the hopper as the floor. Build the walls 2 blocks high. Leave the top open for now so you can add chickens.
Using Glass
Using glass for the walls lets you watch the farm from outside without opening it. This is handy for checking how many chickens you have and making sure they're all healthy.
Step 3 — Add a Trapdoor Roof (Optional)
To stop chickens from jumping out when you open the top, place trapdoors on the top edge of the walls. You can open and close them when needed without removing blocks. It also keeps out rain and gives the farm a cleaner look.
Step 4 — Get Your Chickens
Now you need at least 6 chickens. More chickens means more eggs per hour. You can find chickens in most grassy biomes, and you can lure them using any type of seed held in your hand.
Walk them toward the farm, open a trapdoor or temporarily remove a wall block, and guide them inside. Alternatively, you can throw eggs into the farm to spawn baby chicks — they grow into adult chickens and start laying eggs themselves, letting the farm become self-sustaining over time.
Breeding for a Bigger Farm
Once you have at least 2 chickens inside, you can breed them by feeding each one seeds. Baby chicks take 20 minutes (1 in-game day) to grow into adults. A good starting target is 10–20 chickens for a solid egg output.
Step 5 — The Hopper Collects Everything
Every egg a chicken lays will fall to the ground and get picked up by the hopper below. The hopper automatically transfers eggs into the chest, so you just need to visit the chest occasionally to grab your haul.
With 10 chickens, you can expect roughly 30–50 eggs per in-game day passively collected. That's plenty for most survival needs.
Tips and Improvements
Lighting
Add torches or lanterns inside the farm. Chickens won't lay eggs in complete darkness, and lighting also prevents hostile mobs from spawning nearby.
Underground Version
Building the farm underground lets you keep it active even when you're exploring far from base, since underground structures tend to stay loaded longer. Dig a small room, place the chest in a wall alcove, and funnel eggs through a hopper into it.
Adding a Lava Blade for Cooked Chicken
If you want to turn this egg farm into a full chicken farm that also produces cooked meat and feathers, you can add a dispenser with a lava bucket and a redstone clock above the chickens. The lava briefly touches the chickens and instantly cooks any that die, dropping cooked chicken into the hopper. This is more complex but very efficient for food production.
Item Sorter
If you already have an item sorting system in your base, connect the egg farm's chest output to the sorter using additional hoppers so eggs automatically route into your organized storage.
How Many Chickens Is Too Many?
Chickens are entities, and too many entities in one place can cause lag — especially on lower-end machines or servers. A good cap for a small survival base is 20–30 chickens. Beyond that, consider using a chicken cooker design instead, which culls the population automatically.
Troubleshooting
Eggs aren't going into the chest: Double-check that the hopper is connected to the chest by shift-clicking. Also make sure nothing is blocking the hopper from above.
Chickens keep escaping: Make sure your walls are 2 blocks tall. Chickens can't jump over a 2-block wall. Trapdoors on the top row help too.
Farm isn't producing eggs: Check your lighting — chickens need at least light level 1 to lay eggs. Also make sure you have adult chickens, not just chicks.
Final Thoughts
An automatic chicken egg farm is one of the easiest passive resource farms in Minecraft, and it pays off fast. Once built, you'll never scramble to find eggs again. Set it up early in your survival world and let it run in the background while you go mining, exploring, or building. The eggs will be waiting for you when you get back.
Happy farming!