
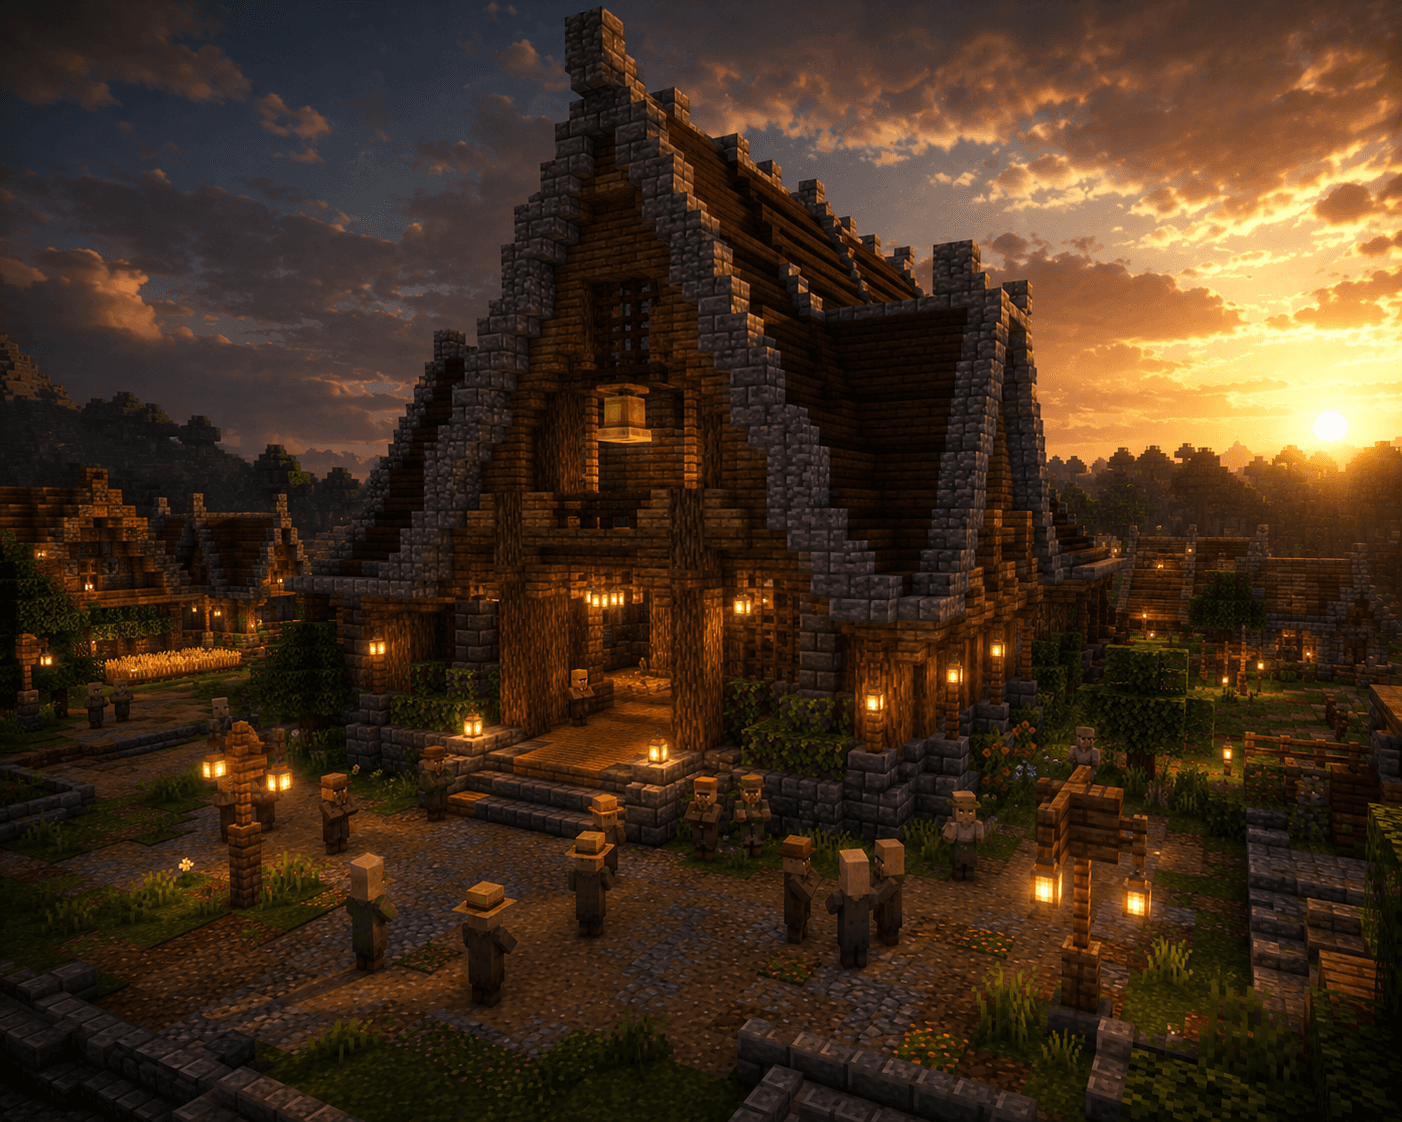

A village hall is the perfect centerpiece for any settlement, providing a gathering place for villagers and players alike. It's both functional and aesthetically pleasing, making it an essential structure for any large base. This guide will walk you through creating an impressive village hall from start to finish.
Planning Your Village Hall
Before breaking any blocks, take time to plan your design. The village hall should be proportionally larger than surrounding buildings to establish it as the community center. Most effective designs feature symmetrical layouts with a central gathering space.
Consider the location carefully. Position your village hall in the center of your village area where multiple paths converge. This creates natural traffic flow and makes it the obvious focal point. A flat or gently sloped terrain is ideal—you can always terraform if needed.
For most player-built villages, a village hall measuring approximately 20 blocks wide by 30 blocks long with a 12-block-tall interior works well. This size is impressive without being overwhelming, and it's manageable for solo builders.
Foundation and Base Structure
Start by clearing and leveling your building site. Mark out the footprint with wool or concrete in your chosen dimensions. The foundation should be one block thick, providing a clear distinction between the ground and the building structure.
Use dark wood types like dark oak or blackwood for the base layer—this creates visual weight and grounds the structure. Arrange them in a frame pattern, leaving space for decorative additions. A one-block height works well for foundations, with the main building walls rising from here.
Create an entrance platform slightly raised from the ground level. A 2-3 block elevation works well, accessed by stairs leading up from the village ground. This emphasizes the importance of the building and prevents mobs from easily entering.
For the corners, consider using pillars that extend from the ground to the roof. These structural elements add vertical interest and break up the wall monotony. Space pillars every 4-6 blocks along each wall for visual consistency.
Walls and Support Structure
The main walls should use materials that contrast with the foundation. Light oak or spruce works excellently with dark oak bases. Vary the materials within the wall pattern—perhaps alternating between wood and stone, or adding vertical wood beams to stone walls.
Create a frame structure using the darker wood within the walls. Vertical columns every 4-6 blocks provide visual divisions and authentic building structure. Horizontal beams between columns can create interesting geometric patterns when combined with lighter materials.
Windows are essential both functionally and aesthetically. Space windows regularly across walls—approximately every 4-6 blocks horizontally and at 2-3 different heights vertically. This provides lighting for the interior and breaks up large wall sections. Use panes or full glass blocks, potentially with wood frames for a more rustic appearance.
Leave space for a large doorway. The main entrance should be dramatic—at least 3 blocks wide and 4 blocks tall, framed with decorative arches or additional structure. Doors are merely functional; the framing creates the visual impact.
Roof Design
The roof is the most visible element from a distance and sets the building's character. Pitched roofs are classic village hall designs, created using stairs and slabs arranged in a triangular profile.
For a pitched roof, start from the top of your walls and place blocks at progressively increasing angles. Dark stairs work well for roofs—dark oak or blackwood contrasts nicely with lighter walls. Create a ridge line down the center, using the steepest angle at the peak.
Overhanging eaves add depth and shadow, protecting the walls visually and creating rain shelter. Extend the roofing 1-2 blocks beyond the wall perimeter using stairs and slabs.
Consider adding a decorative cupola or bell tower at the roof's center. A small structure rising 3-4 blocks above the main roof with a bell or similar decoration draws attention to the peak and adds architectural interest.
Interior Layout
The interior should reflect a public gathering space. The center should be open and spacious, without excessive furniture. Position seating and facilities around the perimeter to maintain clear sightlines to the center.
Create a large central gathering area with a decorative floor pattern. Use contrasting materials—perhaps light and dark wood arranged in geometric patterns, or stone and wood combinations. The floor's visual interest draws attention to this central space.
Position tables around the perimeter, perhaps with chairs for seating. A bar or counter on one side can provide a focal point. Use crafting tables, lecterns, or brewing stands positioned functionally but also decoratively—they should look like they belong in a community space.
Windows positioned high in the walls allow sunlight to illuminate the interior without creating harsh contrasts. This prevents the interior from appearing dark or cave-like while maintaining privacy from ground-level outside viewing.
Decoration and Details
Details make the difference between a generic box and an impressive community center. Add lanterns outside the main entrance for welcoming evening lighting. Lanterns on the corners of the building add character and continue the lighting theme.
Decorate the roof peak with a weather vane or flag. A simple design using banners—perhaps showing your building style or color preference—creates a personalized touch visible from great distances.
Plant landscaping around the building's base. Trees, flowers, and hedges soften the harsh building edges and integrate it into the landscape. A small plaza with decorative paving in front of the entrance creates an inviting arrival experience.
Add minor details like flower pots on windowsills, decorative barrels or crates, and small garden beds. These individual touches transform a structure into a lived-in space that feels developed and cared for.
Integration with the Village
Your village hall should connect to surrounding buildings through well-defined pathways. Use wood, stone, or decorative paving to create clear routes from the hall to surrounding homes and facilities.
Space villagers strategically around the hall. Farmer villagers near agricultural areas, craftspeople near workshop buildings, and librarians inside the hall itself or in attached study areas. The placement should tell a story of community organization.
Create secondary structures nearby—perhaps a well, bulletin board, or marketplace—that support the hall's function as a community center. These additions enhance the village's sense of purpose and place.
Final Touches
Stand back frequently during construction to assess proportions and visual balance. A structure that looks perfect at close range might feel awkward when viewed from the distance where villagers and players will often see it.
Light the interior adequately for functional spaces while maintaining some shadows for visual interest. Mix torches, lanterns, and glowstone for varied lighting effects. Exterior lighting should be warmer in color—orange torches rather than bright white lighting.
Consider the nighttime appearance. Buildings should look inviting rather than ominous at night. Warm lighting from windows and lanterns creates this inviting atmosphere far better than over-lit, institutional-looking buildings.
Conclusion
Building an impressive village hall requires balancing aesthetics with function. Your hall becomes the identity of your village—a place where villagers gather and players return to feel a sense of community. With careful planning and attention to detail, you'll create a structure that anchors your village and provides endless satisfaction. Whether you're building for function or artistic expression, a well-constructed village hall stands as a testament to your building skills and creativity.