
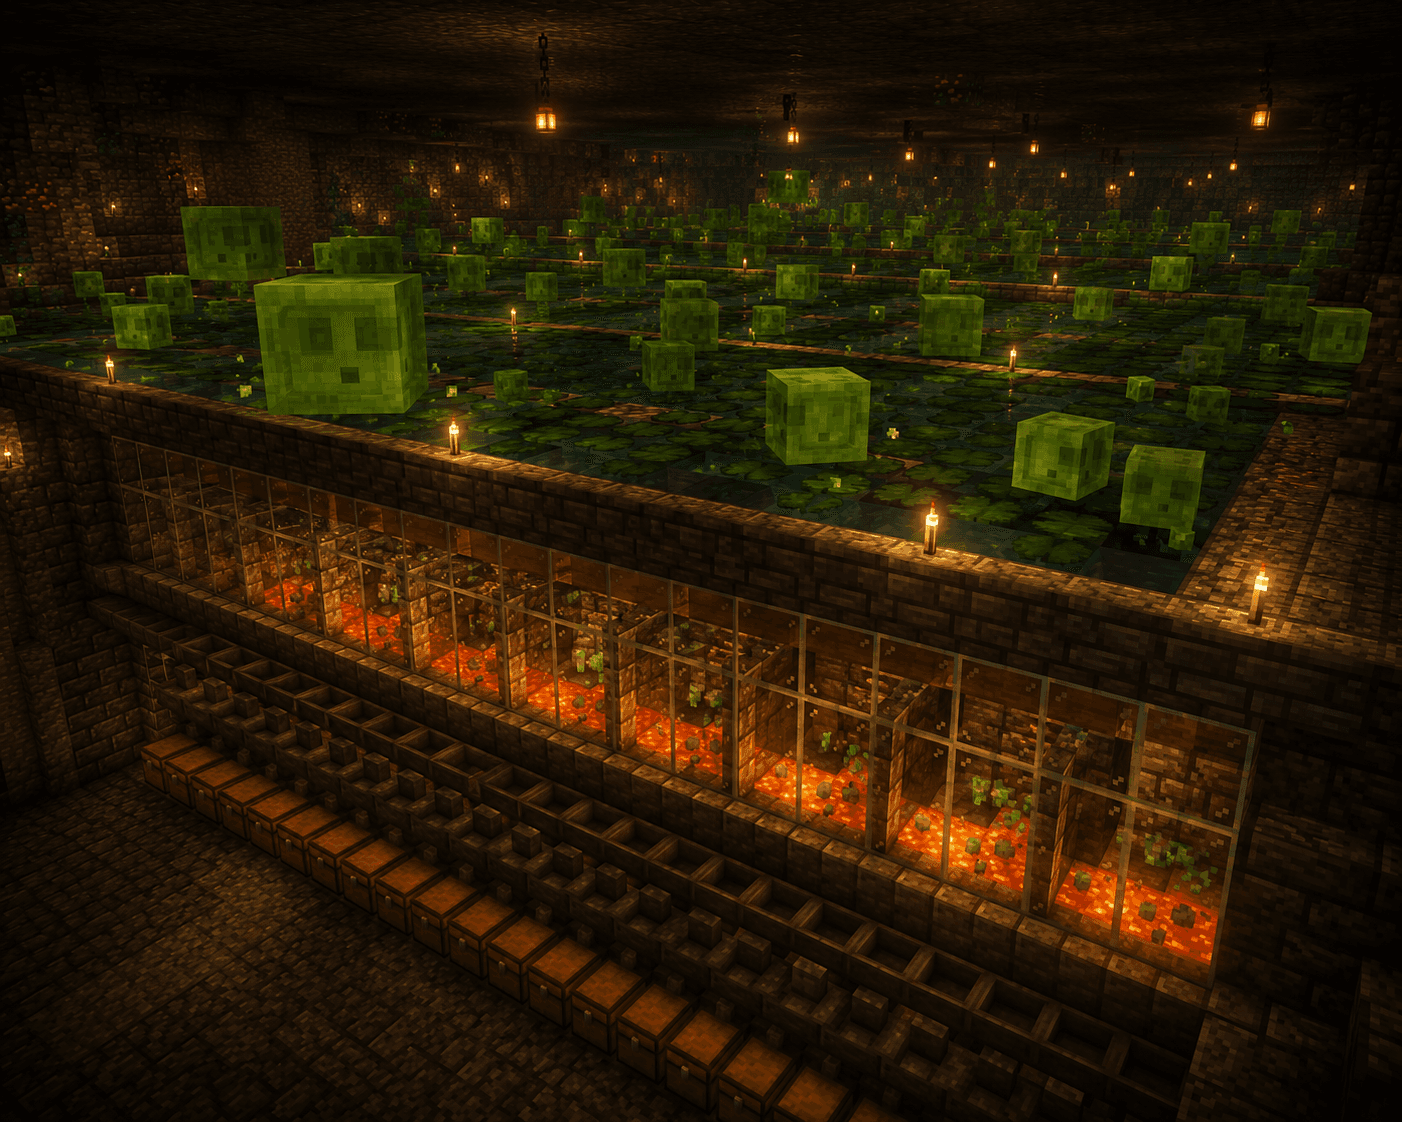

Slime is one of Minecraft's most valuable resources. From crafting sticky pistons to creating bouncy block contraptions, slime balls are essential for advanced redstone engineering and many technical builds. However, hunting for slime in swamps or slime chunks is tedious and inefficient. The solution? Build an automated slime farm. This comprehensive guide will teach you how to construct a fully functional slime farm that produces unlimited slime balls with minimal maintenance.
Understanding Slime Spawning
Before building a slime farm, you need to understand when and where slimes naturally spawn in Minecraft.
Slime Chunks are the primary method for slime farms. These are specific chunks where slimes spawn underground at any light level when the chunk is loaded and players are within range. Slime chunks are determined by the world seed and chunk coordinates using complex mathematical formulas, but you can use online tools or mods to locate them.
Swamp Biomes allow slime spawning between Y levels 50 and 70 during twilight hours, but this is unreliable compared to slime chunks.
Slime Chunks spawn slimes from Y level 0 up to Y level 40, making them predictable and farmable. This reliability is what makes slime chunk farms so effective.
Finding Your Slime Chunk
Locating a slime chunk near your base is the first crucial step. You have several options:
Online Slime Chunk Finders allow you to input your world seed and view a map showing all slime chunks in your world. This is the fastest and most reliable method.
Manual Testing involves digging down to Y level 0-40 and watching for slime spawns. If slimes appear frequently in a particular chunk, you've found a slime chunk.
Command Block Method uses the command /locate slime if you're playing on Java Edition with cheats enabled (though this locates slime balls on the ground rather than slime chunks).
Once you've identified your slime chunk, mark it clearly with pillars or torches so you can navigate back easily.
Building Your Slime Farm
Step 1: Prepare the Slime Chunk
First, clear a large area within your slime chunk from Y level 0 to approximately Y level 40. This area should be roughly 48x48 blocks to maximize spawning surface area. Mine out all blocks, creating a vast hollow chamber.
The chamber size matters because slimes only spawn on certain block types. Sand, gravel, or dirt work well, but stone-based blocks in the middle of the farm are ideal for controlling spawning.
Step 2: Create Spawning Platforms
Slimes spawn on solid blocks in slime chunks. Create multiple platforms throughout your chamber using blocks like gravel, sand, or stone. Space these platforms 3 blocks apart vertically and arrange them across the entire 48x48 area.
The platforms should be slightly elevated (about 2 blocks high) to allow slimes to fall into your collection mechanism below while still being able to spawn.
Step 3: Build the Kill Chamber
Below your spawning area, construct a collection chamber where slimes will be killed and their drops collected.
Create platforms positioned 1-2 blocks above lava or suffocation block arrangements. When slimes spawn and fall onto these platforms, they take damage and eventually die.
Suffocation methods are preferred over lava in modern slime farms because lava can cook items, while suffocation ensures pure slime ball drops.
Step 4: Collect Items with Hoppers and Chests
Connect hoppers beneath your kill chamber, funneling slime balls into chests or item collection systems. Position hoppers strategically to collect drops from multiple areas efficiently.
Link your hopper network to chest storage, positioning chests in an easily accessible location above your farm for convenient slime collection.
Step 5: Implement Spawn Prevention
Since slimes take time to spawn and die naturally, you can significantly increase farm efficiency by preventing spawning outside your designated platform areas.
Light up all adjacent caves and areas outside your farm chamber to prevent slimes from spawning elsewhere and wasting spawn potential. Place torches every few blocks to eliminate dark spots.
Alternatively, cover surrounding areas with carpet or half-slabs, which prevent mob spawning while remaining less cumbersome than full lighting.
Advanced Slime Farm Optimizations
Chunk Loading
Slimes only spawn when chunks are loaded and a player is within range. Keep yourself within 128 blocks of your slime farm for optimal spawning rates. For completely AFK farming, use an AFK platform positioned within the required radius.
Spawn Rate Optimization
The spawn rate increases with available spawning surface area. Each platform represents hundreds of potential spawn locations, so larger farms produce more slimes.
Typical farms produce approximately 1-2 slime balls per minute at small scale (16x16), scaling up to 10-20+ per minute in massive industrial farms (48x48 or larger).
Automatic Slime Farm with Redstone
Advanced players can create fully automatic slime farms using redstone:
Suffocation Mechanisms using moving pistons automatically kill slimes on a timer, ensuring consistent drops.
Hopper Clocking Circuits automatically move items from temporary storage into main chest storage, preventing inventory buildup.
Redstone Comparators can activate lighting systems or other mechanisms based on slime production levels.
Troubleshooting Your Slime Farm
No Slimes Spawning: Verify you're actually in a slime chunk using an online checker. Ensure the chunk is loaded and you're within 128 blocks.
Inconsistent Spawning: Light up all nearby caves to prevent spawning competition. Ensure no half-slabs or carpet accidentally prevent spawning on your platforms.
Low Drop Rates: Increase your platform area. More platforms mean more potential spawn locations and higher overall production.
Items Disappearing: Ensure sufficient hopper coverage and that items aren't despawning before collection.
Slime Farm Location Considerations
Position your slime farm in an isolated location away from your main base. The constant spawning of slimes can create lag if the farm is located in a frequently visited area.
Underground positioning is ideal, at least 128 blocks away from other spawn-eligible areas. This ensures slime spawn potential isn't wasted on mobs spawning in nearby caves.
Consider building your slime farm near your nether hub or other infrastructure, creating a dedicated farming area separate from your main living spaces.
Using Your Slime Farm
With an active slime farm, you'll have unlimited slime balls for:
Sticky Pistons which are essential components in almost every advanced redstone machine.
Slime Blocks for bouncy platforms and aesthetic builds.
Leads and Rope crafting (slime balls are used in lead recipes).
Potion Crafting as certain potion effects require slime balls.
Unlimited slime availability transforms your redstone engineering capabilities, allowing you to build complex mechanisms without worrying about resource constraints.
Conclusion
A slime farm is one of the most valuable automated production systems in Minecraft. While construction requires effort and resources, the unlimited slime supply justifies the investment many times over. Whether you're building a modest farm for basic slime needs or a massive industrial complex for maximum production, the principles outlined in this guide will ensure your farm operates efficiently.
Start with a small farm, test the mechanics, and expand once you're confident in your setup. Soon you'll have more slime balls than you could ever use, opening up infinite redstone possibilities for your Minecraft world.